Sunday, January 29, 2012

Well, look who finally showed up!

Winter's finally here!  There's snow and it's sticking.  Guess I'd better get that gnome out of the garden.  He's never going to dig himself out of there, what with that coffee-spoon-sized shovel.  (Martha would never leave a gnome to freeze like that.  Come to think of it, Martha's probably not the gnome type!)

Snow makes me want to stay inside.  Staying inside makes me want to craft.  I'm finally finished my report cards, which means I can go back to having some form of down time.  Time to bust out the crochet!

Sunday, January 22, 2012

This is no time to get creative...

Report card season does not leave much time for creativity.  I splurge on pretty highlighters and post-its and try to look on the bright side.

I do love the data entry and organizational components of the whole process, though.  Tonight I collated a whackload of papers to send home with students.  The clutter is slowly disappearing.

I did manage to bail on report cards and complete the craft for my Valentine's Initial Heart Swap this weekend, but the reveal will have to wait until the recipient receives her gift.  I'm hoping to mail it tomorrow.  Actually, I'm hoping to do a lot of things tomorrow.  I guess I'd better get to bed, rest up, and keep that hope alive. :)

Tuesday, January 17, 2012

Mail For Me!

I was disappointed tonight when all I got from the mailbox was a splinter from running my hand along its empty wooden bottom in the dark.  Then I stepped inside and realized that hubby had slipped home at lunch time and brought the mail in with him.  There was....


....a little package!  For me!

Now, the contents were very cool all by themselves.  But, much like that famous computer company that I love so much (rhymes with Schmapple, perhaps you've heard of it), the creative packaging turned what may have been a one-photo blog post into a full out slideshow.  Here goes...

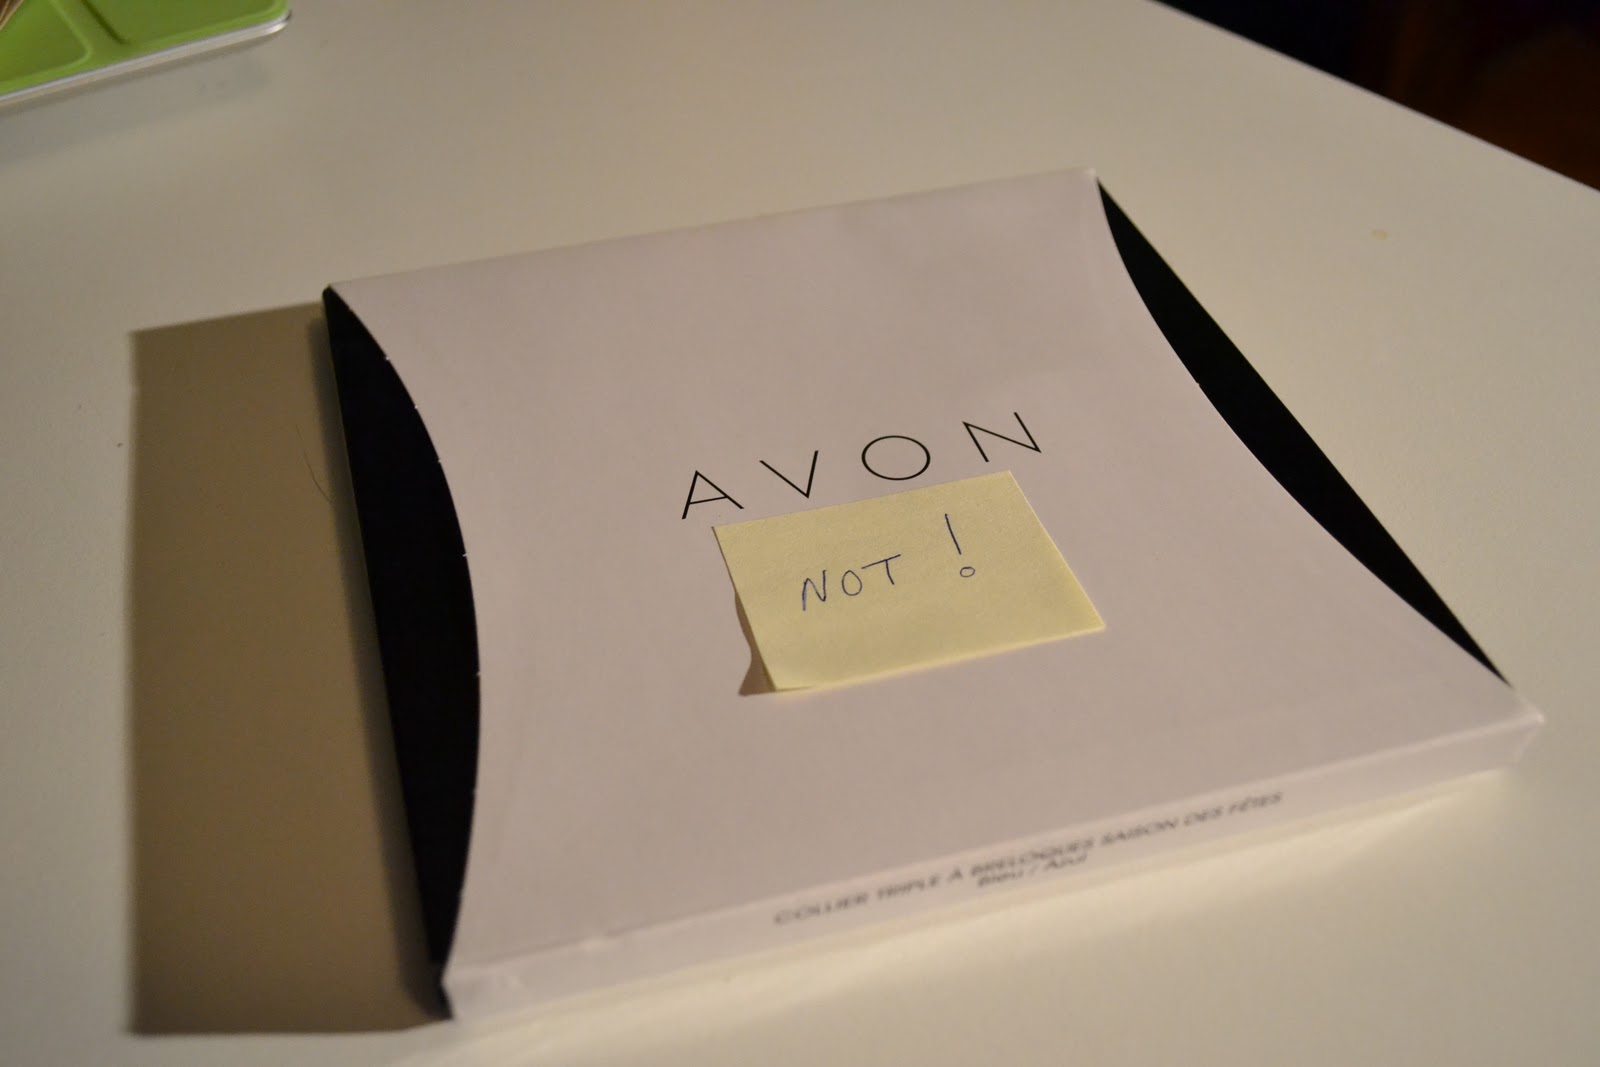
 A recycled box with a post-it notification of what it didn't contain.

 (A very cool recycled box that slid open, all fancy-like.)

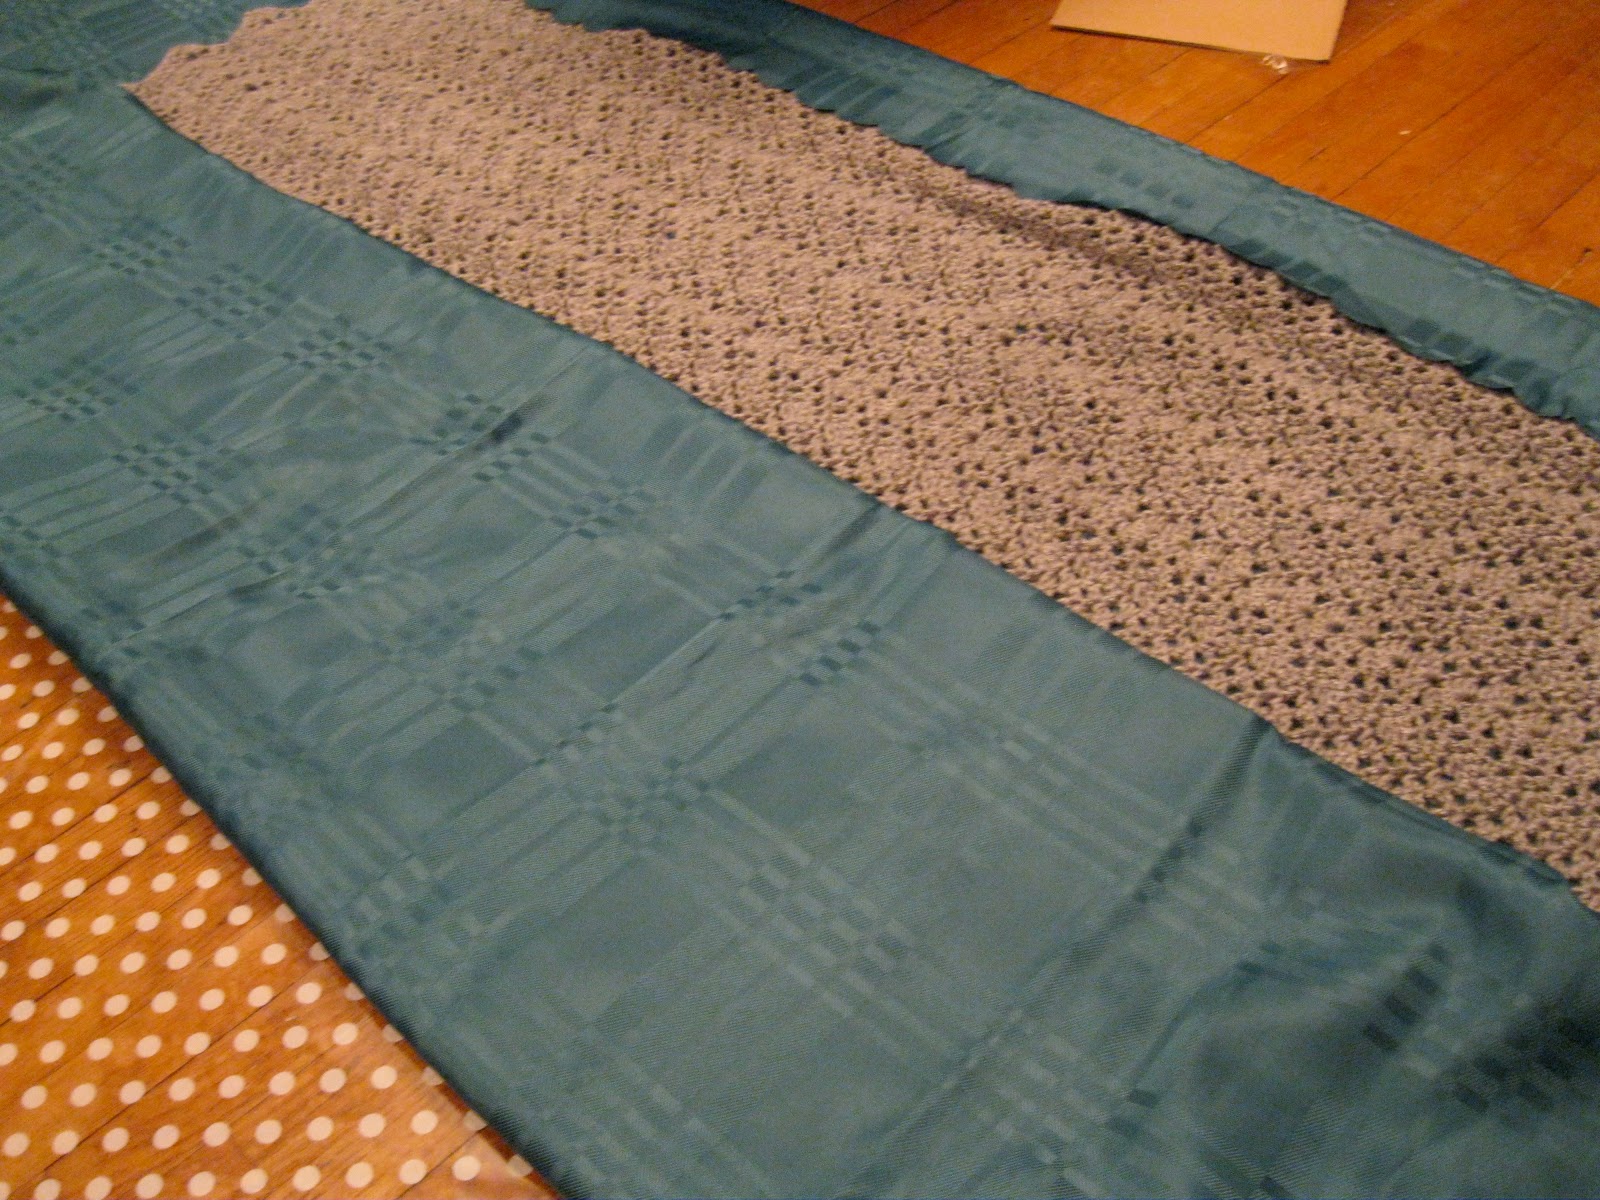
Inside, more post-its applied to a carefully flattened origami box folded from a Stratford-on-Avon map.  (Different Avon. :) Figured that one out without a post-it note! Yay, me!) 

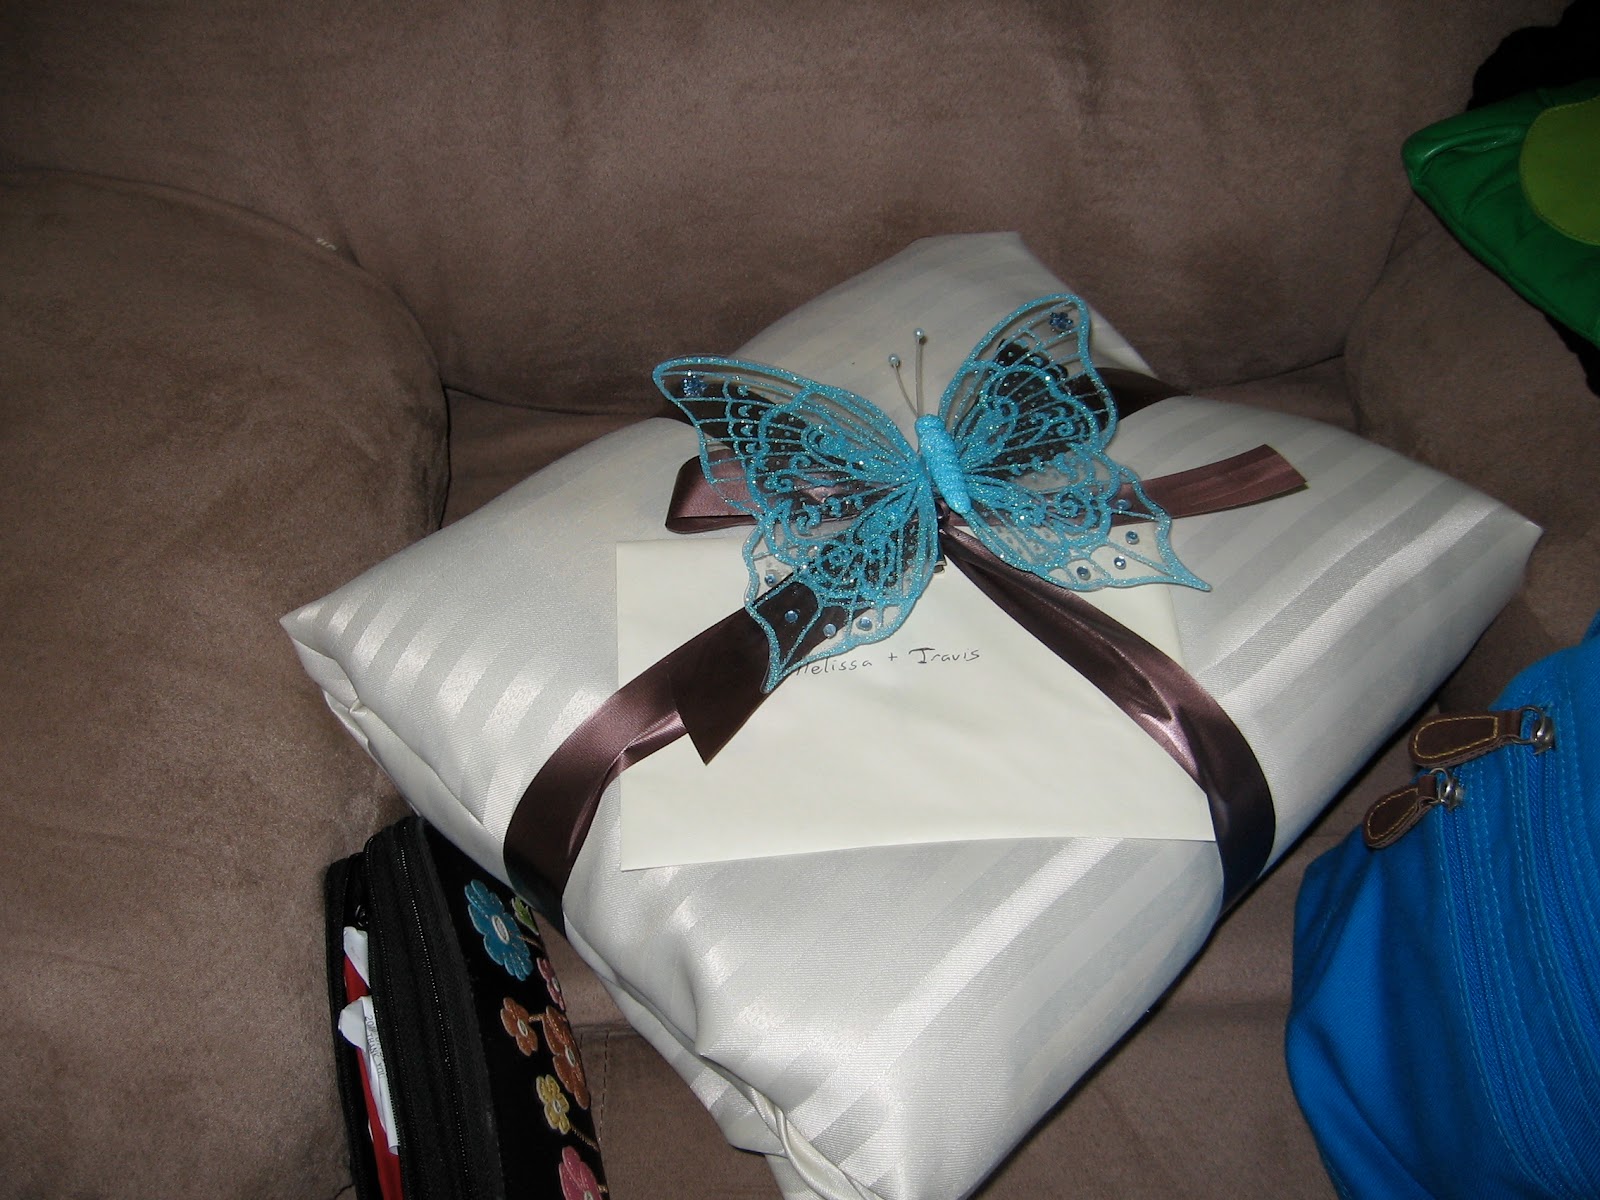
And carefully wrapped in tissue paper, this very cool pendant...


 ...made from a Scrabble tile!  (This is where it gets spooky, because just two days ago I was staring at the box of Scrabble tiles on my craft shelf wondering what they might become.  Then, just one day ago, I was madly pinning Scrabble-inspired items to my "Monogram....Monogram.....MONOGRAM!!!" Pinterest board.  Bonus points to those of you who get the Simpsons reference here. )

"N."  For "necklace." ;)


Spookier still, the blue butterfly perfectly matches my blue floral print shirt I'm wearing today.  So I popped the necklace on and merengued off to dance class.


Also in the box was a note card.  This, in addition to the post-its and carefully addressed envelope, were all penned in what I thought was my friend Jenn's unmistakable neat handwriting.


A cutesy card enclosed in a coordinating envelope.  It just had Jenn's name all over it.  Except that actually it didn't.  As I read the note, I became more and more confused about why Jenn was writing about herself in the 3rd person.  I had to read and re-read the letter before I finally picked up on one important detail.  It wasn't from Jenn.  Well, it was from Jenn, but it was delivered via her mom, Janet.

It's a good thing that I know Jenn was such a good girl growing up.  With cloned handwriting like that, she would have had such an easy time forging notes for her teachers!

The full back story, for those who need to know those sorts of details was that I was walloped with a 24-hour virus when Scotland friends Jenn & Matthew were visiting the area over Christmas holidays and I missed my chance to see them.  Thoughtful Jenn had prepared a little gift in an origami box for me.  When she didn't get the chance to see me before heading back across the ocean, her thoughtful mother put the gift into something a little more sturdier for mail travel and sent it my way.

Like mother, like daughter...to the core...the apple doesn't fall far from the tree...and these are two good apples... I'll stop with the fruity phrases now. ;)

Inspired by the creative packaging and the nifty gifties, I'm motivated to get cracking on packing the tickle trunk of hats for my little Northern pixie friend.
Here are the hats, clambering into a box, eager to travel.   (Hats are eager creatures.  After all, it is their sole duty to "go on ahead."  Go on a head.  Get it?  Oh, people should pay me to be this corny.)

A lovely end to a busy day.  And busy means un-crafty, but that's okay on occasion.  The only thing I'm going to make today is popcorn.  Off to do that now. ;)

Monday, January 16, 2012

My First Swap

I've signed up for my first swap.  Yep, I'm going all in with this blog thing.  Cheryl at Gone Stitchin' has organized the whole event.  It's kind of the Secret Santa equivalent for Valentine's Day.  I have been given a person to create for and I need to make something that features a heart with her initial.

The neat part about it is that I can read my recipient's blog to find out what kind of crafty stuff she's into.  At the moment I have no ideas about what to make, but I'm hoping creative inspiration strikes soon...

Saturday, January 14, 2012

Free Pattern: Fuzzy Monster Hat

Materials:
- about 1/3 ball of worsted weight acrylic yarn (and a small scrap in an alternate colour)
- about 1/2 ball of novelty eyelash-type yarn
- size K hook
- size N hook

Instructions:

Row 1:  Make 10 dc in magic ring,  and pull tightly together.  Join with sl st.

Row 2:  Ch 1, 2 sc in every stitch around (20 sc).  Join with sl st in 1st stitch.

Row 3: Ch 2, *2dc in 1st stitch, sc in next stitch.  Repeat from *.  Join with sl st.

Row 4:  Ch 2, *2dc in 1st stitch, dc in next 2 stitches.  Repeat from *.  Join with sl st.

Row 5:  Pick up fuzzy yarn.  Holding fuzzy yarn and regular yarn together, ch 1.  Turn.  1 sc in each stitch around.  Join with sl st.

Row 6:  Drop fuzzy yarn, but do not fasten off. Ch 3, turn.  *2dc in 1st stitch, dc in next 3 stitches.  Repeat from *.  Join with sl st.

Row 7: Repeat row 5.

Row 8: Drop fuzzy yarn, but do not fasten off. Ch 3, turn.  *2dc in 1st stitch, dc in next 4 stitches.  Repeat from *.  Join with sl st.

Row 9: Repeat row 5.

Row 10:  Drop fuzzy yarn.  Ch 3.  Turn.  1 dc in every stitch.  Join with sl st.

Row 11: Repeat row 5.

Row 12: Repeat Row 10.

Rows 13 to 17: continue to repeat row 5, then row 10, row 5, row 10, etc.

Fasten off fuzzy yarn at the end of row 17.

Row 18: Ch 2.  Turn. 1 hdc in every stitch.  Join with sl stitch.

Row 19: Ch 1.  1 sc in every stitch.  Join with sl stitch and fasten off.  Work in ends.


To make the corkscrews for the top (make 3):
Holding the scrap of acrylic yarn and the fuzzy yarn together, chain 16.  2dc in 3rd ch from hook.  2 dc in every chain following.  (The extra stitches will cause the yarn to curl in on itself.)  Fasten off, leaving  along tail for sewing to the hat.

Attach the 3 corkscrews to the top of the hat by tying them off inside.


Friday, January 13, 2012

This week's dabblings.

What a busy week it's been, work-wise!  Most days ended with me crashing on the couch with a bag of yarn for short bursts of crocheting/relaxation.

I've been playing around with making flowery granny squares.  I started with a pattern, but I've since altered it to suit the yarn and my liking.  I think this could become a lovely throw:


I haven't actually put any stitches into this since December, but I did move the bag that this project was in.  Its on its way to becoming a wrap for me:


I found some cotton squares that I had made, originally thinking that I'd put together a sampler-style baby blanket, but decided that I might turn them into washcloths instead, after seeing how Mel at Lazy Daisy Crochet rolled them into bunnies for gifting.
I'm sharing this post in Visions of Sugar Plum's Fibers on Friday.

Saturday, January 7, 2012

Last Holiday Thriftcraft Hurrah

This is it.  Holidays have come to an end.  Tomorrow will be the mad scramble of preparations before school begins again on Monday.  I couldn't let the day go by without a craft...or two.

It's been a yarn-free weekend.  I found a tutorial for a t-shirt scarf at A Diamond In the Stuff.  (Follow the link for the full explanation.  She does a great job of explaining it.)

I successfully made a green version today, although it's more of a necklace than a scarf.

This was made from a polka dotted t-shirt, so I was disappointed that the fabric curled the other way and only a bit of polka dots popped through.


I'm not over the moon about this one, but I'm going to think about what kind of bling I could add to it and I might save it for Spring.

Cost of the bling-free scarf/necklace: $1.00 for a thrift-store t-shirt.  (Free, if you've got an old or damaged shirt hanging around.)

If you're going to give this craft a whirl, know that the t-shirt fabric must be a jersey knit.  My first attempt was with a cherry pink ribbed knit t-shirt.  While it was a fail, I'm happy to report that I'll be able to turn it into all kinds of funky little rosettes like this one:

Finally, I framed and mounted another piece of sheet music.  It was hard to photograph, thanks to the glare from the glass, but this is going to hang in our bathroom.  I think it's a charming little phrase to have reflected beside my face in the mirror. :)


You can find a quick and simple set of instructions in an earlier blog post.

Cost of this project:  The sheet music was a $1.00 find from an antique mall somewhere near Ithaca, NY.  The frame was a $12.00 special at Michael's.  $13.00 framed decor sounds like a good deal to me!

Friday, January 6, 2012

All Tied Up

Ta da!  Here is the mystery purple hat that has been lurking in the background of a few photos from  this week.  I found a great little roll of ribbon at Michael's yesterday ($1.69!).  After about an hour spent fiddling trying to get the bow tied just right, I present the final hat (which is definitely in the running as my absolute favourite)!

I love polka dots.  And purple!

The pattern is not my own.  It is from Tracy Faulkenberry's CroCreations blog, which is one of my new favourites this week.  It's supposed to fit a 3-year-old, so here's hoping it fits the recipient.

A bow close-up.  Still not sure if I tied this right.

Brilliant: a round with front post triple crochets leaves a large enough gap to slip ribbon through.
...and that "caps off" my beanie bonanza.  Now, to celebrate with a few link parties:  Fibers on FridayHappy Go Lucky and Fiber Arts Friday.

The photo below is just something I'm playing around with to help me give credit where it's due on Pinterest.  Thanks for indulging me. ;)


Thursday, January 5, 2012

Three Skeins: The (Almost) Final Chapter

My three skeins personal challenge is drawing to a close.  This is not because I ran out of yarn, but simply because I ran out of inspiration.  I stopped at 6 hats.  Here they are, in a family portrait:


Finishing It Off With A Big Red Bow

This is the purple striped beanie that was in progress yesterday.


I made a red bow and slipped a hair barrette through it so that the bow can be worn on its own,
or clipped to the hat.  I think it looks cutest right on the front. :)


Fun, Furry, Fabulous

The next hat is not so photogenic.  I don't know if it's the sheen of the yarn, but I can't seem to get a photo that shows the texture and colour properly.


I guess I cheated a bit, since this hat uses yarn that wasn't from the three skeins.  It's some unidentifiable scrap from the thrift store and--wow--was it wild to work with!  I used the lilac yarn as the base and then held together the strands of novelty yarn and lilac worsted to crochet every other row.

There are three dark purple/novelty yarn corkscrews popping out the top.


Ugly Hat

The next hat is the sign that I was finished playing with these three balls of yarn.  I call him Ugly Hat.  In an effort to use up more yarn quickly, I crocheted 2 (and sometimes 3) strands together.  When I flipped up the brim (as in the pic below) and added a corkscrew to the top of this one, Ugly Hat became Less Ugly Hat, but even so...
I dunno.  I kinda feel like I should take this one to the forest and leave it for the underprivileged woodland elves...


More To Come...

I still have two balls of yarn leftover that are the size of small baseballs.  (This means I probably could have ended up with 8 or 9 complete hats.)  Rather than use these for hats, I'm tossing them in the scrap bag, since my next projects will definitely be focused on using up scraps!


There is one more hat that I haven't blogged about yet.  (Look at the 'family photo' above and you'll see something dark and mysterious hovering in the back row.)  If I make it to the craft store this afternoon for the ribbon I need to complete it, then I'll be completely finished with the hats show-and-tell.  But I've still got more projects in the pipeline!

Party On....
Today I'm link partying with: House of Hepworths, Somewhat Simple, and These Peas Taste Funny.  They have so many great shared ideas today that I might never leave my computer!

Wednesday, January 4, 2012

The Continued Adventures of 3 Skeins of Yarn

Despite the fact that it's still Christmas break, I didn't find much time to craft yesterday.  In fact, I spent most of my day organizing the basement and then started in on the office.  It feels good to organize, but I was suddenly overwhelmed by just how much yarn I have on hand!  We're talking box-after-box-after-box full.  I'm not sure if I'm bragging or complaining. :)

One of the main reasons I love to crochet is because I love the feeling of creating order out of chaos.  A mushy skein of yarn becomes row-upon-row of something beautiful.  I can't deny that I was getting the same kind of rush out of organizing my yarn yesterday!

Anyway, the next year will be filled with stashbusting projects.  By the end of this week, I'm hoping to finish up my existing projects so that I can start making a dent in that stash.

One project I currently have on the go is a personal challenge to see how many child-sized hats I can make from 3 skeins of yarn.  I posted about this earlier this week, but here's an update...

This hat:

became this hat...
Only a little person could get away with wearing something this ridiculous!

I added a shell stitch around the bottom (5dc, ch1, skip 1 sc, sc, ch 1, skip 1...repeat) and this flower to do the top.  (The instructions for the flower are included at the bottom of the post.)


I also started in on this hat, experimenting with growing stripes.  I'm liking the purple on purple. :)

How many hats can a small bundle of yarn create?  Well, I'm at 4.5 and counting.  I guess I'll just keep plugging along and find out!

----

To Make the Crochet Flower:

Make a ring.  (Either a magic ring or ch 4, and join with sl in first ch.)

1.  Ch 2.  12 dc in the ring. Join with sl to the first dc.
2.  *Ch 2.  dc, hdc in same stitch.  Sl stitch in the next stitch.  Repeat from * 5 more times to make 6 petals.  Fasten off and leave a long tail for sewing the flower to the hat.


Today, I'm linking up with the following parties:  someday crafts, Tami's Amis, and Ambassador Crochet.

Tuesday, January 3, 2012

How To Gift Wrap An Afghan

This post is the response to a repeated request from family, friends and fantastic blog readers.  I firmly believe that half the fun of gift-giving is in the gift wrapping.  Presentation counts for a lot...and blankets can be tricky to wrap.

Crisp wrapping paper + soft blanket corners = a frustrating time.

Solution: head to the dollar store or the mill end store and wrap it up like this:
A dollar store table cloth, a roll of satin-y dollar store ribbon, and a dollar store glittery butterfly clip.
...or like this:
One metre of mill-end fabric, 1.5 metres of gros-grain ribbon, and a dollar store Christmas tree decoration.
Here's the step-by-step breakdown from my most recent wedding afghan.  This one includes an outer layer of cellophane wrap, which I included to keep the snowflakes out. ;)  The wrapping ended up being Christmas-ier than I intended, but I guess I was just in the holiday spirit. ;)


1.  Roll out the entire roll of cellophane gift wrap.  (Yes, you can get it at the dollar store.)


2.  Lay the tablecloth or fabric wrapping down over the cellophane and lay the afghan on top.  (If the afghan is larger than the table cloth, I recommend folding it in half before you keep wrapping.)

3.  Fold in the excess edges of the table cloth on either side.


4.  Holding both the tablecloth and afghan together, fold in to the middle.  Both sides will be folded in, so it's helpful to think about folding in thirds.

4.  The top and bottom ends of the afghan/table cloth combination are still loose, like this:

5.  (Here's where I seem to have missed a photo.)  Fold in the other side of the afghan and table cloth, holding both together.  You should now be looking at a big long rectangle of tablecloth with no afghan visible.

6.  Wrap the cellophane around and secure with clear tape.  (I needed an extra set of hands to do this part.)


7.  Fold in the top and bottom overhanging ends of table cloth and secure with a bit of tape.

8.  Fold in both ends of the wrapped "tube" to meet near the middle.  (Leave a bit of a gap, as shown in the picture, to make the final folding step easier.)

9.  Make one final "fold," right along the gap from step 8.

10.  Secure your wrap job with ribbon.  (Sometimes extra hands are helpful at this point, too!)

11.   Add a bit of bling to the top of your package.  :)

These bells were Christmas decorations that came in a package of 12 from the dollar store.


12.  Take a photo of your wrap job (...because I totally want to see it).


p.s.  Apparently this is the 50th post on my blog.  I guess I'm officially a blogger now.  I think I'll celebrate with another cup of coffee before I return to my New Years organizing blitz.
Related Posts Plugin for WordPress, Blogger...